When I tell people I started retouching jewelry 23 years ago, they usually imagine a glamorous studio setup. The reality? It was a battlefield.
If we look back to about 15 years ago, the jewelry photography we received from clients wasn’t just challenging—it was bad. Really bad. Back then, people simply did not know how to shoot jewelry. Cameras had low resolution, lighting was harsh, and macro photography wasn’t accessible to everyone.
Yet, clients wanted quick, cost-effective results. We didn’t have the luxury of spending hours on a single image. We had to work fast, work smart, and rely on pure raw skill.
The 23-Year-Old Secret: Some Things Never Change
Despite all the marketing hype around AI and “one-click” software today, the core foundation of high-end jewelry retouching hasn’t actually changed.
1. The Pen Tool is Still King
People think modern automated cutting tools are magic. They aren’t. To this day, cutting out jewelry properly requires the Photoshop Pen Tool. That basic tool has remained exactly the same for 23 years. If you want a crisp, professional edge that doesn’t look blurred or eaten away by an algorithm, you still have to draw it by hand.
2. Clone, Clone, and Clone
Today, Photoshop has half a dozen variations of healing brushes and content-aware tools. Fifteen years ago? We heavily relied on one single tool: The Clone Stamp. We cloned out dust, cloned out scratches, and rebuilt metal reflections pixel by pixel. It was tedious, but it built an incredible discipline.
3. The Classic Shadow Trick
We didn’t have advanced rendering engines for natural dropshadows. For reflections and shadows, we did it the classic way: duplicate the layer, flip it, mirror it underneath the piece, and fade it out using gradients. It was simple, but it worked beautifully.
4. Levels and Contrast
Because the lighting in the original photos was usually flat or poorly balanced, the Levels tool was our best friend to punch up the contrast, make the metal pop, and bring back the deep blacks in the reflections.
The Rise of “Copy Paste” Jewelry (And Why We Don’t Do It)
While tools have evolved, I’ve noticed a frustrating trend in the modern retouching industry—especially with low-cost, mass-production studios in Asia.
Because they want to work too fast, many retouchers today will literally take “perfect” digital stones or shanks from an entirely different piece of jewelry and glue/paste them onto the client’s item. The result? It looks completely fake.
I cannot believe how many jewelry companies put these cartoonish, hyper-digital images on their websites. A piece of jewelry needs to look real, premium, and authentic to your craftsmanship—not like a video game asset.
My Philosophy: In my 23 years in this business, I have never copy-pasted stones from other pieces. True retouching means enhancing the unique beauty of your specific piece, not replacing it with a generic digital template.
Case Study: “Just Clean It Up”
To give you an idea of what we used to deal with, look at the sample below.
This image is a good example of what clients used to send us 15 years ago. It was shot with a low-res camera and terrible or no lighting. The owner gave us a classic, simple brief: “Just tidy it up, cut it out, change the chain, and sharpen it a bit.”
Back then there was heavy reliance on the Clone tool and Levels. Today, while we have better software to speed up the workflow, the goal remains exactly the same: delivering a clean, sharp, authentic image that actually sells the product.
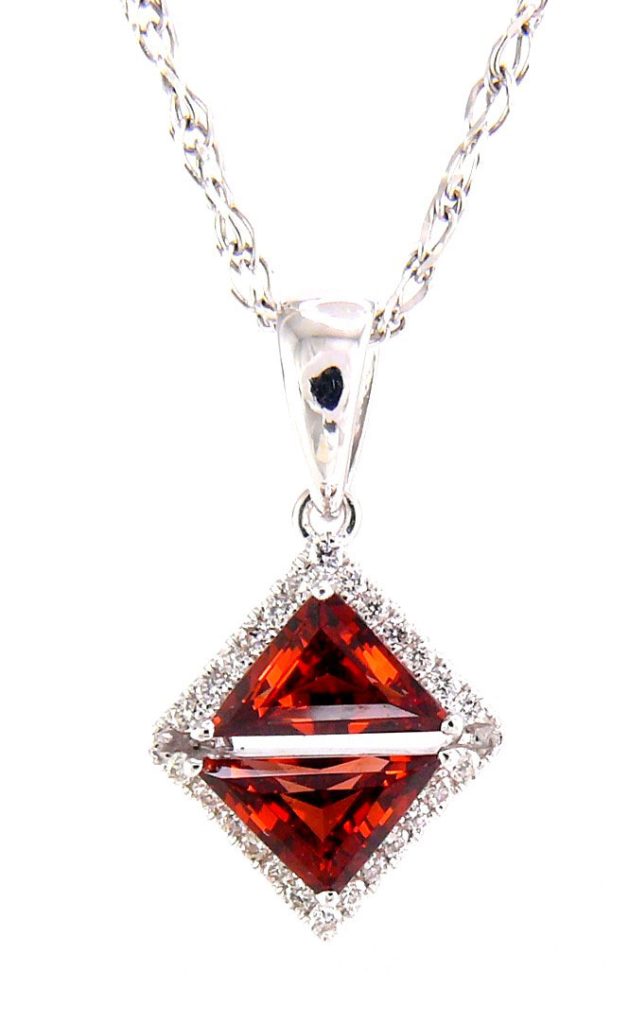
So, I did exactly that—and oh boy, looking back, I wasn’t proud of this one. But the original image was so bad that there wasn’t much anyone could do about it. Back then, there were only two jewelry retouching sites on the entire internet. It was just mine and another studio based in Moldova. The boss over there paid his team such a miserable salary that one of his retouchers actually contacted me directly and started working for me instead.
And here is the finished result. I cut the piece out, replaced the chain entirely, and sharpened it using the Unsharp Mask filter. Then, I used the Levels tool to make the jewelry pop and applied desaturation to strip the ugly, unrealistic color casts right out of the metal.
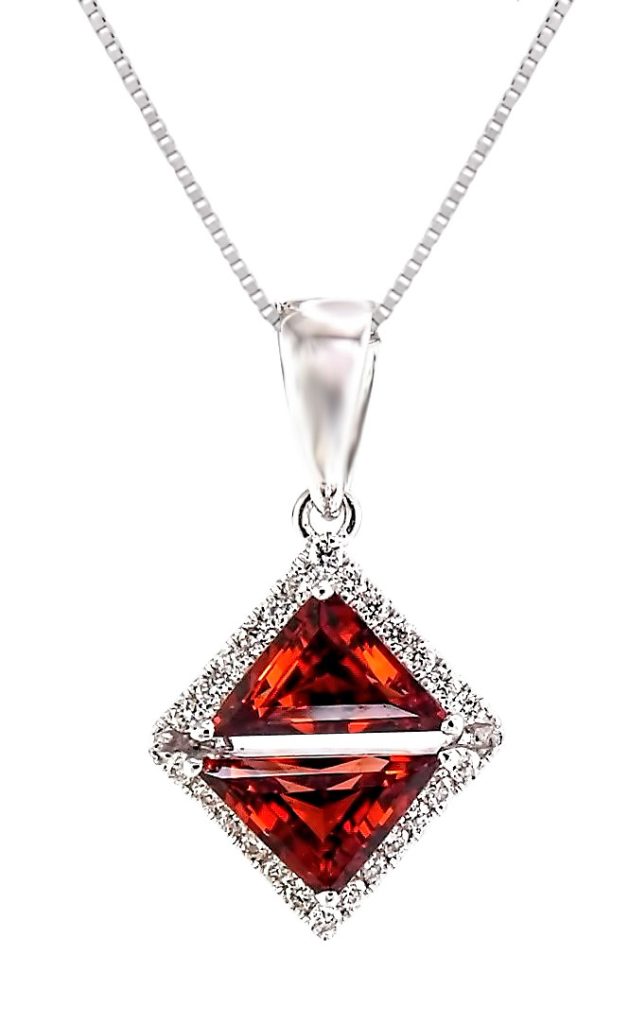
Ultimately, it was a quick retouching job built on a horrible foundation. Our hands were tied; the jewelry owner had hired a photographer who delivered terrible shots. However, it wasn’t all bad back then. Every once in a while, we received images that were actually shot better than what we see today. Photographers from England, in particular, did an amazing job. But that was incredibly rare—maybe one out of every two hundred clients. For the most part, the photography was poor because people simply hadn’t figured out how to shoot jewelry yet.
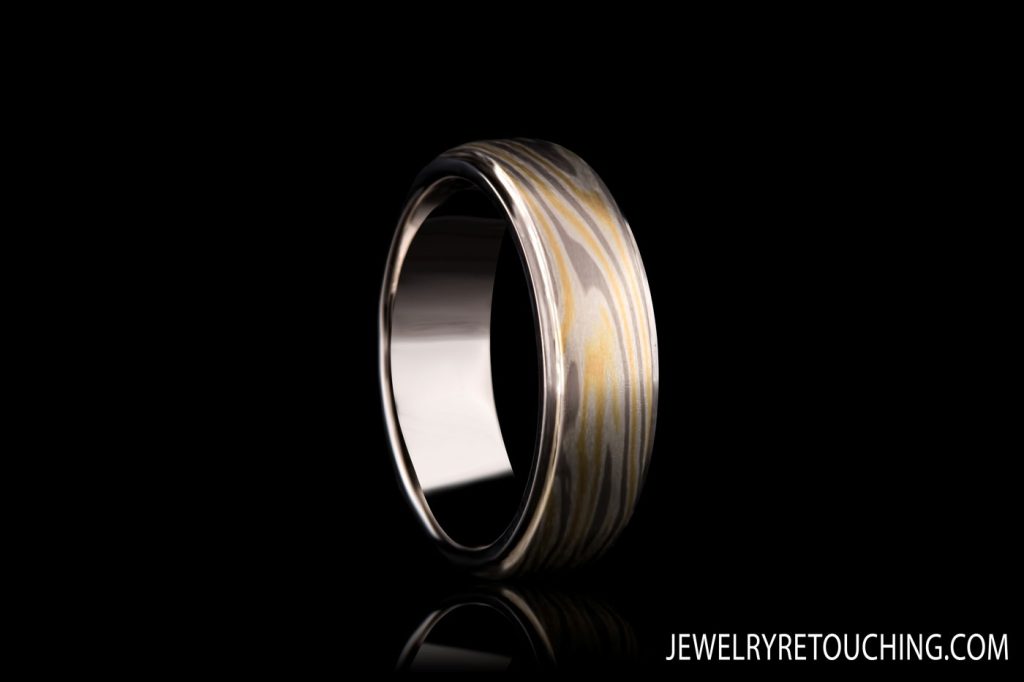
On the flip side, when a client´s photographer was a pro, the results were amazingc. For example, I had a client from Japan who delivered excellent photography, which really allowed us to showcase our true retouching skills. Remember, this was 15 years ago, and I am still incredibly proud of the work I did on that project. In fact, you could easily use those images on a website today. They hold up perfectly, especially in a modern market where most imagery is artificially 3D-rendered or completely AI-generated.
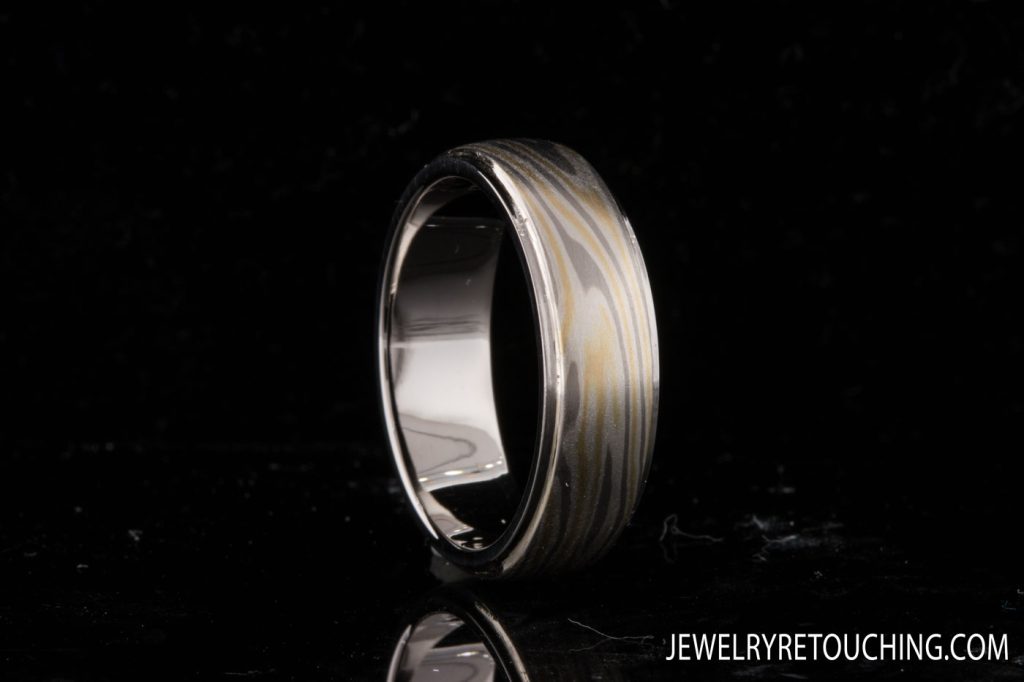
This image required a precise cutout using the Pen Tool, followed by the careful removal of the mounting putty and a thorough background cleanup. I cloned out the artifacts and imperfections in the shank, added a subtle touch of sharpening, and the final result was excellent. As I mentioned before, you could use these images today without a single problem. They look significantly better than the work of lazy modern retouchers who copy and paste the exact same small diamond fifteen times and slap on a generic shank from another picture.
And here is the finished result.